 SANHANG三行共创科技有限公司
How to Add Shelves to Acoustic Slat Wall Panels
A practical installation and buying guide covering panel measurements, mounting methods, shelf depth, bracket spacing, load position and no-drill compatibility.
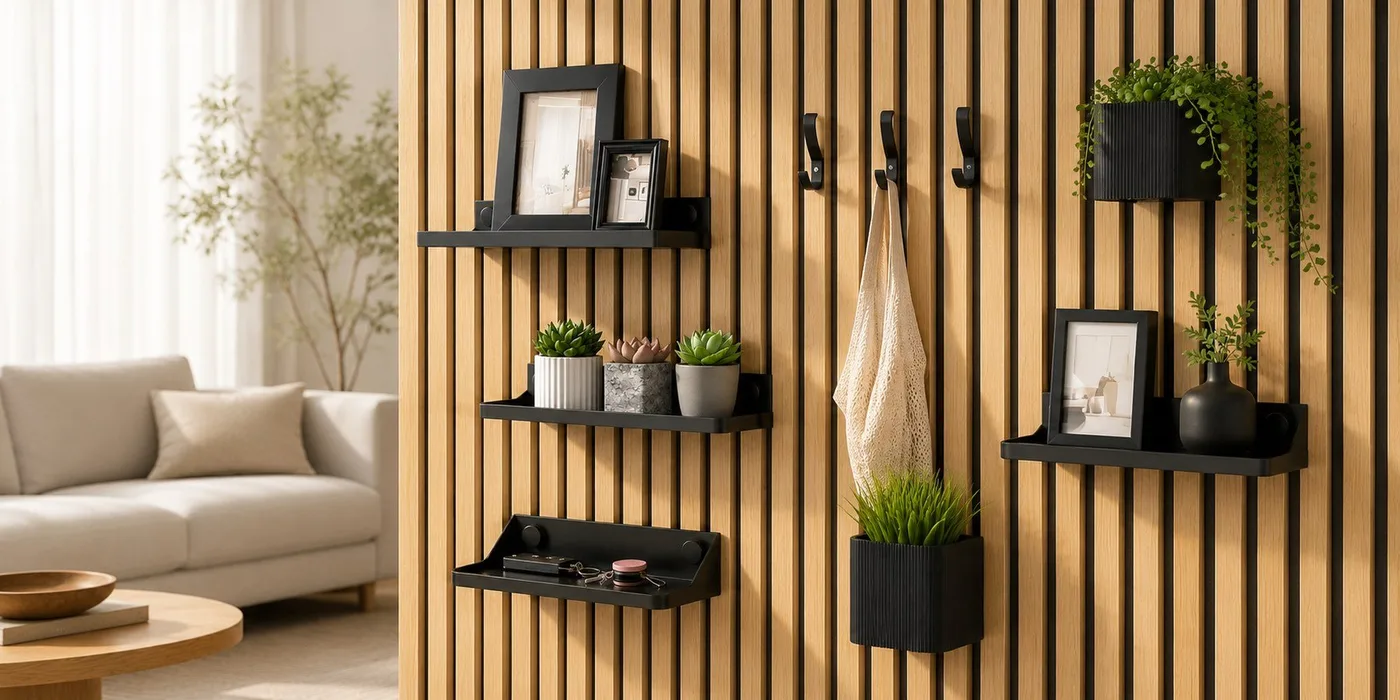
Start with the wall, not the shelf
Acoustic slat panels may look similar in photographs while using different slat widths, gaps, depths and backing materials. A bracket that fits one system may be loose, too tight or impossible to install on another. Before choosing a shelf, record the actual panel dimensions and identify what the mounting part will contact.
| Measurement | Why it matters | Useful tool |
|---|---|---|
| Slat width | Controls how a clip or side clamp seats on the wood profile. | Caliper or accurate ruler |
| Gap between slats | Determines whether a hook, fastener or tightening feature can enter the gap. | Caliper; measure several gaps |
| Slat depth | Affects wrap-around brackets and the available contact area. | Depth gauge or ruler |
| Felt and wall build-up | Shows whether a fixing can reach the structural wall and whether felt may compress. | Panel drawing or installer information |
| Shelf depth and load position | Controls leverage on the bracket, not just the total object weight. | Shelf drawing |
Three common mounting approaches
1. Fixing through the panel into the structural wall
This is the conventional choice for heavier shelves. The acoustic panel is not treated as the primary structure; the fixing passes through it and anchors into a suitable wall or support behind it. The installer must choose fasteners for the real wall construction and avoid crushing or splitting the decorative slats.
Best suited to: heavier shelves, valuable objects and installations where permanent fixing is acceptable.
2. Fixing directly to a suitable wood slat
Some installations use the wooden slat itself as part of the fixing system. This can be practical only when the slat construction, attachment to the backing and permitted load are understood. A decorative slat should not automatically be assumed to carry a heavy shelf.
Best suited to: systems whose manufacturer or installer has confirmed the fixing method.
3. Compatible no-drill accessories
Clamp-on, clip-on and slot-mounted accessories can add small shelves without drilling the visible panel surface. Their performance depends on accurate fit, useful contact area, resistance to rotation and controlled clamping pressure. “No drill” describes the installation method; it does not mean every accessory fits every panel.
Best suited to: lightweight décor, keys, small plants, routers and other applications within the tested working load of the final configuration.
A step-by-step no-drill installation check
- Confirm compatibility. Compare the product drawing with the measured slat width, gap and depth. Do not rely only on a room photograph.
- Inspect the contact surfaces. Make sure the bracket sits against the intended faces rather than one rounded edge or a small accidental contact point.
- Position the brackets. Use two support points for a wider shelf and keep them symmetrical unless the product instructions specify otherwise.
- Level before loading. Check that both brackets are fully seated and that the shelf does not twist when pressed gently at each corner.
- Load gradually. Place the intended object close to the wall first, then observe sliding, rotation and bracket flex.
- Recheck after initial use. Confirm that the shelf remains level and that the contact surfaces have not marked the decorative finish.
A shelf test is only meaningful when it uses the real shelf depth, bracket spacing and load position. Pulling vertically beside the wall does not reproduce the leverage created by an object at the front edge.
How shelf depth changes the load
Weight alone is not enough to describe shelf demand. Moving the same object farther from the wall increases the turning force on the bracket. A shallow key shelf and a deep plant shelf can therefore require very different mounting geometry even when the objects have a similar mass.
- Keep heavier objects as close to the wall as practical.
- Use a shallower shelf when the application does not need extra depth.
- Increase bracket spacing or use two mounting points to reduce twist on wider shelves.
- Check whether the bracket remains stiff enough to maintain its clamping force.
Choose the shelf around the real use case
| Use case | Design priorities | Extra check |
|---|---|---|
| Keys and small entryway items | Shallow projection, easy access, rounded edges | Nothing can slide into a walkway |
| Small plant or décor | Stable base, useful front lip, two-point support where needed | Moisture cannot reach the wood or felt |
| Wi-Fi router | Ventilation, cable clearance, shelf dimensions | Device heat is compatible with the material |
| Retail or showroom display | Repeatable fit, clear working load, fast installation | All panels use the same profile |
Common mistakes to avoid
Calling a bracket universal without dimensions
Acoustic panel geometry varies. Publish the controlling dimensions and state which panel faces the bracket contacts.
Solving sliding only by tightening harder
Excessive pressure can mark a decorative slat while failing to solve poor contact geometry, shelf leverage or bracket flex. Improve the system rather than relying on extreme force.
Testing a bracket without the final shelf
The shelf board, object position and distance from the wall change the load path. Approve the complete configuration, not only an isolated clamp.
Using one product name for different fits
Distributors should separate variants with clear model numbers, dimensional drawings and packaging labels so warehouse staff and customers can identify the correct version.
Information B2B buyers should send with an enquiry
- Slat width, gap and depth, preferably on a cross-section drawing
- Panel brand or construction details when available
- Shelf width and depth
- Intended object and target working load
- Preferred material, colour and packaging
- Estimated sample and production quantities
- Target market and any labelling or instruction requirements
SANHANG supports fit review, prototype development, wholesale supply and OEM/ODM versions for acoustic panel distributors and project buyers. A physical sample on the actual panel should be approved before volume production.
Buyers who are still comparing formats can review the acoustic panel shelf bracket options, then send the chosen use case and measured panel profile through the project enquiry form. This keeps general product discovery separate from the final compatibility decision.
Frequently asked questions
Can I install a shelf without drilling the acoustic panel?
Often yes for lightweight applications, provided a compatible clamp-on, clip-on or slot-mounted accessory has been designed and tested for the exact panel profile and shelf configuration.
Can an acoustic slat hold a heavy shelf?
Do not assume that a decorative slat is structural. For heavier loads, use a fixing method approved for the wall construction behind the panel and obtain installation advice for the specific project.
Why does a no-drill shelf slide down?
Typical causes include insufficient contact area, dimensional mismatch, bracket flex, excessive shelf depth, off-centre loading or rotation that reduces effective grip.
What dimensions should I send to a supplier?
Send slat width, gap, slat depth, backing details, shelf size and the intended load. A cross-section drawing and a sample of the actual panel provide the clearest basis for compatibility review.
Related commercial solutions
No-Drill Acoustic Panel Accessories
Explore no-drill acoustic panel accessories that attach to slats or gaps without conventional wall drilling. Review compatibility and clamping pressure.
View solution →CLIP-ON SYSTEMSClip-On Acoustic Panel Accessories
Compare clip-on acoustic panel accessories for removable shelves, holders and wall organisation. Learn what measurements determine clip fit.
View solution →REPOSITIONABLE ACCESSORIESRemovable Acoustic Panel Accessories
Reposition shelves, hooks and holders on acoustic slat walls with removable mounting concepts. Compare clamping, fit protection and repeat use.
View solution →Send the slat width, gap, depth and intended use. We can review compatibility or discuss a custom version.